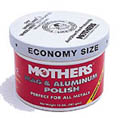
Polishing Your Metal Parts
NOT Regular Steel!
| Items Needed: | 1. Safety glasses |
| 2. Breather (Don't breathe in that dust!) | |
| 3. "Dry" sandpaper 80-180 grit | |
| 4. "Wet" sandpaper 220-2000 grit | |
| 5. Sanding block or piece of 2x4 | |
| 6. Metal polish, i.e. Mothers | |
| 7. A dremel or a dual action sander might help | |
Estimates: |
Time: Varies, but it takes a while, don't rush it. Cost: Depends on what your polishing, just cost of sandpaper and polish. |
These instructions are assuming that whatever metal part that you are trying to sand down and polish has already been prepped and/or removed. |
|
What grade paper you start with will depend on what you need to sand. For instance if you're doing a rough surface like on the frame of and R6, start with the 80 grit and keep working that until all ridges are gone. If you're sanding a pretty smooth surface, you may start with 100 or 180 grit.
Sand in all directions.
If there is a "grain" or machine marks (like on swingarms), start by going against them, then other direction, then against again. Sand this way until they disappear.
After this first sandpaper grade, you should have a smooth, scratchy surface. No pits, divots, or lines should appear other than the ones made by the sandpaper.
Same thing all over again. Repeat this until you've moved through all the grades and have a nice shiny surface.
Use your own judgement when to move to the next grade.
If you do decide to do your welds, ONLY DO ENOUGH TO GET THE EDGES OUT!
I do not recommend people do them.
If you sand or grind too much, you can effect the integrity of the weld, which can cause them to break under stress from such simple things like riding.
Using your favorite brand of metal polish (make sure it has a protectant), buff up your newly polished metal.

TAKE YOUR TIME. This will take quite some time. It's more than a weekend project if you're doing things like frames and swingarms, estimate up to 40-50 hours.
Using a wet sanding method for the higher grit sandpaper makes it much easier.
Start off each sandpaper grade pushing somewhat hard, then ending soft and light.
The dremel or dual-action sander would help with the first sanding steps, but DO NOT PRESS HARD! You will have marks and scores that will be impossible to sand out!
If you are doing it on the bike, make sure the part is FULLY accessible for you to sand and protect (cover, tape, remove) items close by, incase you get a bit over zealous or go crazy. It's also a good idea to just remove or cover everything to protect the parts. Also make sure you block intake and exhaust while doing this! If wet sanding, tape electrical ends. Cover chains as well.
DON NOT polish steel! Unless you plan to clearcoat it, and even then, very bad idea. If you do, I hope you like rust.
"If your arm ain't sore for a few days, you ain't doin it right. At this point you should not have skin on your finger tips, if they aren't purplish-pink and/or have blood blisters, start over, you messed up somewhere...lol." <Greg2k1R6 @ R6MessageNet.com>
"Use your best judgement when sanding a surface. If you estimate that you can start with a 320 grit, go one or two grit levels lower to like a 220 grit or even 180 grit." <Suliman @ R6MessageNet.com>
Special Thanks To:
- Greg2k1R6 on R6MessageNet.com for tips and some info!