Brake Line Removal, Install, and Bleeding
| Items Needed: | 1. Can of brake cleaner |
| 2. Brake fluid | |
| 2. Clean rags | |
| 3. Plastic tubing for bleeder nipples | |
| 4. Jar for old and overflow brake fluid | |
| 5. Tray or cup of some sort for parts | |
| 6. Appropriate tools for line removal | |
Estimates: |
Time: 2 - 4 hours Cost: ~$50 - $100 USD for the brake lines ~$5 - $10 USD for the brake fluid |
Attach tubing to bleeder nipple and other end of tubing into the jar.
Remove cover from the fluid reservoir and open bleeder screw. Pump the brake lever until all fluid is removed from the line and close the bleeder screw.
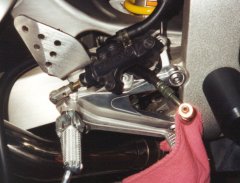
When removing the brake line, be sure to have a rag under the bolt as you loosen and remove to prevent dripage.
Make sure you make note of washer locations upon removal and place all old washers and parts in the tray.
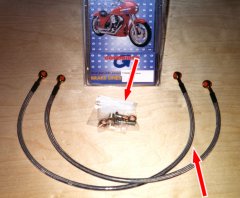
Replace the old brake line with the new one using the new bolts and washers supplied.
Torque (tighten) to spec. Check the torque spec with a dealer (or shop manual) and also check with the new brake line manufacturer. Many times the new bolt torque will be less than the factory parts. If you over tighten, you can snap bolts.
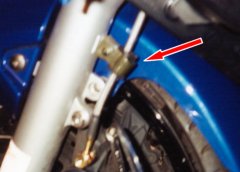
Many bikes have brackets that the brake lines run through. If the old lines had any sort of guard or rubber on them for those areas, remove the guards from the old lines and place on the new lines for those mount locations. Try to peel them away as neatly as possible. Doing this will help prevent unneeded wear on you new brake lines.
Obviously repeat this if you are doing the front brakes (or rear) and have more than one brake line.
Once lines are installed and torqued, fill the reservoir while keeping the bleeder screws opens to help fill the lines (make sure the tubing is on the nipple so brake fluid doesn't go every where).
Close reservoir and pump brake lever, then hold it in (or down). While holding, loosen bleeder screw, let air/fluid out, close bleeder screw, then release brake lever. Continue this process until ALL air is removed from system and no more air comes out the bleeder screw. This does take some time to do. It's much easier if you have someone there to help.
After this has been done a few times and little to no air is coming out the bleeder screws, lightly tap the all the brake components to jar any air that may be trapped. Use something rubber coated, like the end of a pair of pliers or a screwdriver head. Then begin the above bleeding process again until no air comes out the bleeder screw.
Be sure to keep an eye on the reservoir and to fill often to keep fluid in it, or you have to start over when it runs dry, sucking air back into the system.
For dual line systems, you will need to bleed one side, then the next. Then go back to the first side, bleed it again. Then go to the second side and bleed that one again.
Brake fluid will eat through paint!
Use a good DOT4 synthetic brake fluid (i.e., Valvoline Synthetic) that has a high boiling temperature.
DOT5 is great only if you are racing. It WILL need changing more often than a DOT4.